The Ultimate 3D Design Course: Create, Model, and Animate with Confidence certificate & job asslstance
The Future of Creativity Step into the world of limitless imagination with our 3D Design Mastery Course. Whether you’re a beginner or have some experience, this course offers a solid foundation for understanding 3D design concepts. You’ll learn the basics of 3D modeling, from creating simple shapes to more complex structures, and gain hands-on experience with the most popular 3D software tools. This is your opportunity to explore the endless possibilities that 3D design has to offer and unleash your creativity!
ransform Your Passion Into a Career In the final phase of the course, you’ll work on more complex projects, gaining expertise in creating intricate 3D environments, animations, and simulations. We’ll guide you through the process of building a strong portfolio that showcases your skills.

how does this 3D Design Mastery Course
learn
Upskill yourself by gaining insights from leading professionals’ vast experience.
practice
Sharpen your skills by learning through course assignments, live projects, and regular assessments
and quizzes
ask
Resolve your queries from industry experts with our dedicated one-to-one doubt-clearing sessions.
buid
Craft a diverse portfolio and appealing resume, and optimize Linkedin to showcase your data analyt-
ics skills.
curriculum of 3D Design Mastery Course
A detailed overview of the course, including key topics, objectives, and module sequence.
key highlight
what you will learn
- Adobe Photoshop
- Premiere Pro
- After Effects
- Maya
- Nuke
- Z-Brush
- All about the welcome screen
- Move and Artboard tool
- All about layer panel
- Brush tool
- Crop tool
- Clone stamp tool
- Healing tool
- Content-aware fill
- Eraser tool
- Blur, Sharpen, Smudge tool
- Layer Mask
- Black and White Color
- History Panel and History Brush
- Clipping mask
- Dodge, Burn and Sponge tool
- Gradient and Patterns
- Blending options/layer styles
- How to make layer styles
- Vanishing point filter and blend
- Useful websites
- Perspective warp
- Face aware liquify
- Puppet warp
- Align layers
- Remove matte from layer
- Stroke on path
- Anti-aliasing
- Fill layers
- Vector Shapes, Vector smart object
- Raster smart object
- How to save files and export jpeg/png
- How to extract hair with select and mask
- Color channels
- Differences between RGB & CMYK
- Adjustments Sharpen an image
- Change color of any object
- Convert day scene to night
- Gradient map
- Make your own lookup tables
- Custom brushes
- Make professional actions
- Play actions on 100s of images
- Design poster
- How to blur background
- Portrait development and skin retouch
- Shadows in Photoshop
- Double exposures
- Color balance to match the tone of images
- Alpha channel in Photoshop
- Video Resolution
- Frame Rate
- Bit Rates
- Upscaling and Downscaling
- Types of Video Angles
- Creating a Project
- Walking through the Layout
- Importing & Organizing Media
- Creating a Sequence
- Adding Clips
- Basic Video Editing
- Effect Control
- Tools and Shortcuts
- Keyboard Customizing
- Adjusting Clip Dimensions
- Effects Controller – Masking
- Basic Title and Graphic
- Animating Basic Title
- Import Title Elements
- How to Save Custom Animation
- Custom Transition
- Transition Templates Importing
- Difference Between CC and CG
- HUE, SATURATION, and LUMA
- Adjusting Audio with Sliders
- Sound Design
- Simple Cut
- Jump Cut
- J/L Cut
- Fade In Fade Out
- Passing Transition
- Basic Exporting
- How to Export Screenshots
- Regular Speed Settings
- Default Transition & Effect Control
- Dolly Zoom Effect
- Glitch Effect
- Trailer Cut
- Interface and Workspace
- After Effects Tools
- Timeline & Layers
- 3D Tools and Layers
- Shape Tool
- Pen Tool
- Text Tool
- Brush and Erase Tool
- Roto Brush
- Puppet Pin Tool
- Animation Basics
- PSD and AI Documents
- Simple Animation Pt 1 & 2
- Video Editing Part 1 & 2
- Transitions
- Enhancing Elements
- Green Screens
- Overlays
- Speed & Motion
- Stabilize & Color Correction
- Sky Replacement
- Fixing and Exporting
- Text and Video
- Text Tracking
- Clone Tool
- Clone Effect
- Neon Animations
- Still Image Animations
- Time Paths
- Looping
- Liquid Motions
- Logo Motion Examples
- Character Animations
- 3D Basics
- Introduction
- Light
- Layer Styles
- Text Behind Subject
- Elements Through Text
- Green Screen
- VFX Effects
- Much More
- Loading Animations
- Camera Layers
- Overview of Maya’s User Interface
- Customizing the Workspace
- Navigating in 3D Space
- Introduction to 3D Modeling
- Polygonal Modeling Techniques
- NURBS and Subdivision Surfaces
- Move, Rotate, Scale Tools
- Snapping and Alignment
- Object Hierarchy and Grouping
- Edge Loops and Extrusions
- Boolean Operations
- Sculpting in Maya
- UV Mapping Basics
- Creating Materials and Textures
- Shaders and Surface Properties
- Introduction to Lighting in Maya
- Using Directional, Point, and Spotlights
- Final Gather and Global Illumination
- Rendering with Arnold
- Introduction to Rigging
- Joint Creation and Skinning
- Simple Character Rigging
- Keyframe Animation Basics
- Graph Editor and F-Curve Adjustments
- Creating Walk Cycles
- Animating with Constraints
- Using Parent and Point Constraints
- Orientation Constraints and Blendshapes
- Rigging and Animating Facial Expressions
- Camera Types and Settings
- Camera Animation and Paths
- Working with Multiple Viewports
- In-betweens and Motion Curves
- Timing and Spacing
- Squash and Stretch Principles
- Introduction to Rigid Body Dynamics
- Soft Body and Cloth Simulations
- Particle Systems and Fluids
- Light Setup for Dynamic Scenes
- Shadows and Reflection
- Using Depth of Field in Animation
- Particle Effects and Smoke Simulations
- Fire and Water Effects
- Fluid and Cloth Simulations
- Facial Rigging and Blendshapes
- IK and FK Systems
- Using Controllers and Custom Attributes
- Rendering Layers and Passes
- Color Correction and Compositing Basics
- Integrating Maya Renders into After Effects
- Exporting Models and Animations
- Working with Different File Formats
- Final Scene Optimization for Rendering
- Secondary Actions in Animation
- Animating Hair and Clothing
- Advanced Character Motion Techniques
- Introduction to Motion Graphics
- Animating Text and Logos
- Using Maya for 2D Animations in 3D Space
- Final Project: Create a Complete 3D Animated Scene
- Building a Portfolio with Maya Projects
Overview of Nuke Interface
The Node-Based Workflow
Understanding the Timeline and Viewer
Customizing the Workspace
Basic Node Operations (Merge, Transform, Color Correct)
Layer Management and Viewing
Basic Keying Techniques (Primatte, Ultimatte)
Green Screen and Blue Screen Keying
Rotoscoping with the Roto and RotoPaint Nodes
Refining Keys with Edge Handling and Spill Suppression
Color Grading Fundamentals
Using ColorCorrect and HueShift Nodes
Matching Color Between Layers
Advanced Color Grading with LUTs
Introduction to Motion Tracking
Tracking in 2D (Point Tracker, Spline Tracker)
Camera Tracking and 3D Camera Setup
Stabilizing Shaky Footage
Stabilizing Footage Using 2D and 3D Trackers
Working with 3D Nodes (ScanlineRender, Camera, Light)
Integrating 3D Models and 2D Layers
Creating 3D Geometry and Textures
Working with Lights and Shadows in 3D Space
Creating Simple Keyframe Animations
Animation with Transform, ColorCorrect, and Noise
Advanced Animation with Camera Paths
Using the TimeOffset and TimeEcho Nodes
Creating Particle Effects (Smoke, Fire, Dust)
Using the ParticleEmitter and ParticleRender Nodes
Advanced Particle Effects for Compositing
Using Particles for Simulating Weather Effects
Creating Fire and Explosions Using Particles
Simulating Water and Fluid Effects
Lens Flares and Light Effects
Adding Atmospheric Effects (Rain, Snow, Fog)
Working with Depth Data (Z-Depth)
Creating Depth-Based Effects (Fog, Depth of Field)
3D Projection Techniques
Creating Depth Maps for Compositing
Adding Light Wrap Effects for Seamless Integration
Creating Reflections and Refractions in 3D
Realistic Shadows and Highlights in Compositing
Camera Projection Mapping Techniques
Creating 3D Environments from 2D Images
Matte Painting Integration with Live-Action Footage
Creating 3D Parallax Effects
Stereoscopic 3D Compositing in NukeX
Using 3D Model Loader for Enhanced Projects
Depth Passes and Handling Stereoscopic Footage
Importing and Exporting 3D Models in Nuke
Using the Geometry and 3D Render Nodes
Applying Materials to 3D Models
Lighting Techniques for 3D Geometry
Introduction to ACES Workflow
Applying and Creating LUTs (Look-Up Tables)
Color Management in Nuke
Working with Linear and Non-Linear Workflows
Combining Multiple 3D Elements with 2D Elements
Complex Layer Management and Blending Modes
Adding Live-Action Backgrounds to CG Elements
Visualizing Complex Shots for Final Delivery
Working with Render Passes (Beauty, Diffuse, Specular)
Combining Multiple Passes for Final Composite
Multi-Layer Compositing and Fine-Tuning the Final Output
Using Cryptomatte for Seamless Rotoscoping
Output Settings for Final Render
Exporting to Different Formats (EXR, MOV)
Working with Render Queues
Preparing Nuke Projects for Delivery
Applying Course Knowledge to a Final Project
Creating a Complete Visual Effects Shot Using Nuke
Building a Portfolio with Real-World Compositing Projects
Preparing for Industry-Standard Workflows and Techniques
Introduction to ZBrush Interface
Navigating the ZBrush Workspace
Customizing the User Interface
Understanding the ZBrush Tool Palette
Introduction to Sculpting in ZBrush
Using the Standard and Select Rectangular Brushes
Understanding and Using the Draw and Edit Modes
Managing Tool Properties
Using the Move, Scale, and Rotate Brushes
Using the Transpose Tool for Manipulating Meshes
Introduction to Dynamesh for Dynamic Sculpting
Using ZRemesher for Retopology
Understanding Subtools and Tool Organization
Masking and Hiding Geometry
Sculpting Basic Shapes and Forms
Refining Details with the Standard Brush
Creating Hard Surface Sculpting
Using the Trim and Clip Brushes for Cutting Shapes
Understanding the Difference Between Polygroups and Subtools
Introduction to Polygroups and Working with them
Grouping Polygons and Selecting Areas for Sculpting
Creating Complex Shapes Using Polygroups
Using the Polygroups for Efficient Sculpting Workflow
Surface Detailing with Alpha Brushes
Sculpting with Detail Using the Surface Noise Tool
Using the Normal, Displacement, and Bump Maps
Applying Detail with the Stencils and Alphas
Introduction to Texturing in ZBrush
Using the Polygroups for Texture Painting
Painting Directly onto 3D Models Using Spotlight
Using the Projection Master for Detail Painting
Creating and Applying UV Maps
Introduction to Materials in ZBrush
Applying and Modifying Materials
Understanding Material Properties and How They Affect Sculpting
Using the Transparency and Refraction Effects in Materials
Introduction to ZBrush’s Brush System
Creating Custom Brushes
Modifying and Using Multiple Brushes Simultaneously
Saving and Organizing Brushes for Efficient Use
Creating Organic and Hard Surface Sculptures
Refining Organic Sculptures with the Smooth, Polish, and Pinch Brushes
Hard Surface Modeling with the Clip, Trim, and Slice Brushes
Using the Gizmo 3D for Advanced Mesh Manipulation
Introduction to Poseable Meshes and the Transpose Master
Rigging and Posing Models in ZBrush
Using the ZSphere for Building Base Armatures
Modifying Poses and Transitions with the Transpose Tool
Working with Layers in ZBrush
Understanding and Using Layer Masking
Creating Non-Destructive Sculpting with Layers
Blending Sculpting Details Across Layers
Introduction to Rendering in ZBrush
Setting Up Render Properties and Resolution
Creating Render Passes (BPR) for Post-Processing
Finalizing Render Settings for High-Quality Output
Exporting from ZBrush
Exporting Models for 3D Printing
Exporting Models to Other Software (Maya, 3ds Max, etc.)
Exporting Normal and Displacement Maps
Using ZBrush for Character Design and Development
Sculpting Facial Features and Anatomy
Refining Hands, Feet, and Limbs
Adding Expression and Detail for Dynamic Characters
Creating Environment Models in ZBrush
Modeling Terrain, Rocks, and Organic Backgrounds
Using ZBrush for Architectural Visualization
Introduction to ZBrush’s Rendering System
Creating High-Resolution Renders with Advanced Materials and Lights
Final Touches in ZBrush Rendering
Introduction to Advanced Techniques and Tools
Using the FiberMesh Tool for Hair and Fur Simulation
Sculpting Clothing and Accessories with the Cloth Simulation
Working with VDM (Vector Displacement Maps)
Project and Portfolio Development
Applying All Learned Techniques to a Final Project
Building a Personal Portfolio with ZBrush Models
Preparing Your ZBrush Projects for Industry-Standard Presentation
Be in the spotlight by getting certified!
A detailed overview of the course, including key topics, objectives, and module sequence.
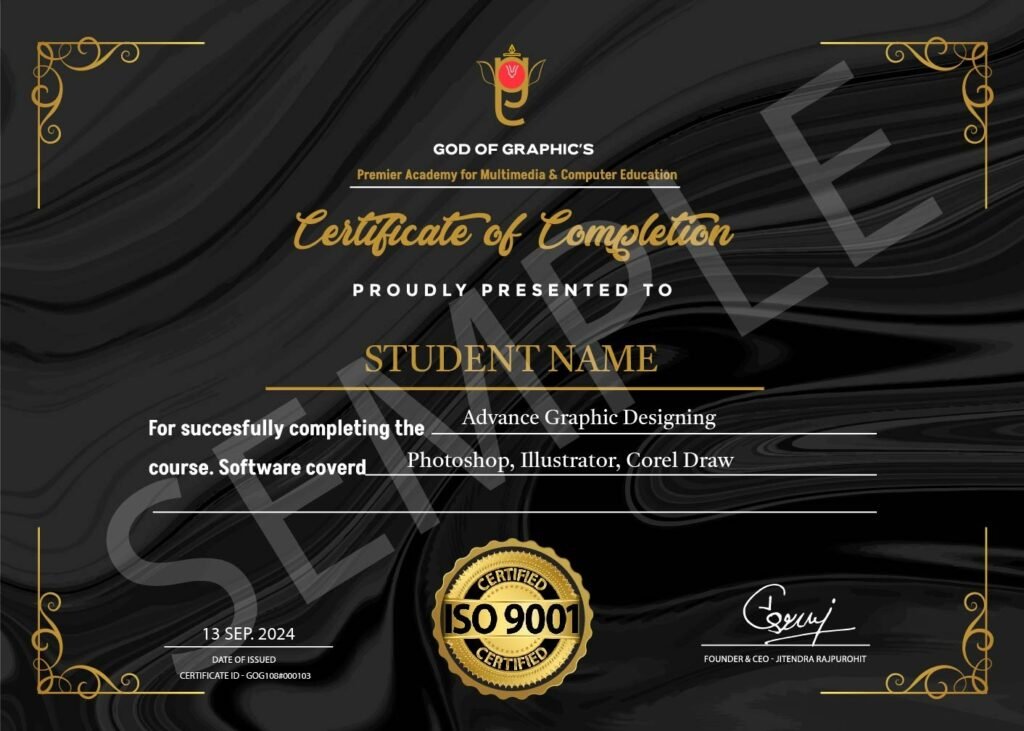
Industry-Recognized
Certificate
Earn a certificate valued by top companies.
Stand Out in Job Market
Fortify Your Profile to Increase Credibility
Your Passport to Career Growth
Access Well-Paying positions
Our 3D Design Mastery Course is a comprehensive program designed to teach you everything from the fundamentals of 3D modeling to advanced techniques used in industries like gaming, animation, architecture, and product design. You'll learn how to use the most popular 3D design software tools to create stunning models, textures, and animations, preparing you for a successful career in 3D design.
The course primarily focuses on the most widely used 3D design software like Blender, Maya, and Cinema 4D. These tools are industry-standard for modeling, texturing, and animation. We also provide resources for learning other software like 3ds Max and ZBrush, depending on your interests.
After completing the course, you’ll be able to create complex 3D models, animations, and renderings. You’ll have the skills to design everything from simple objects to detailed characters, environments, and architectural visualizations. You'll also be able to apply textures, lighting, and special effects to bring your creations to life.
Yes, the course is available online and can be accessed from any device, including computers, tablets, and smartphones. We recommend using a desktop or laptop for the best experience, especially when working with 3D design software.
Simply sign up on our website, and you’ll get instant access to the course materials. We offer step-by-step instructions, video tutorials, and downloadable resources to help you start creating right away. Once you’re enrolled, you can dive into the lessons at your own pace.